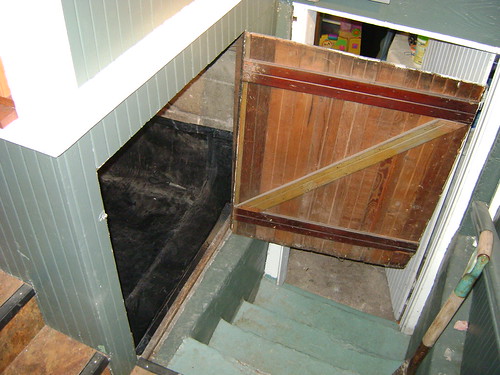
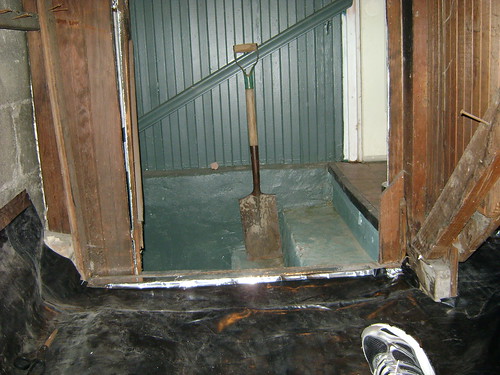
As with many home improvement projects it never occurs to me that I should take "before" pictures until I'm halfway done. So what you see above is the entry to the crawlspace storage area a previous owner created by partitioning off about 40 square foot of the crawlspace near the back stairs of our house. It had a dirt floor and was filthy and I wasn't quite sure how to get into it when I insulated the rest of the crawlspace last summer. Turns out it was just painted shut and I had to cut the door around some of the stair tread rubber edging that had been added since it was created. To get to this point I got the broom and cleaned out all the cobwebs, and then scooped all the loose rocks and dirt I could into a bucket and emptied that outside. Then I shop vac'd all over down there. Next I got some of the six mil plastic I had left over from doing the rest of the crawl space's vapor barrier, and cut it to fit in the space.
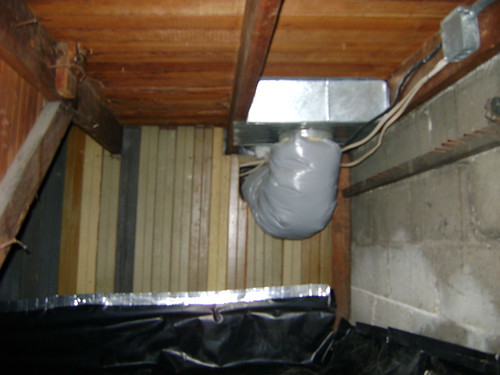
This shot's kind of blurry but you can see that I've taped the plastic to the walls with aluminum tape that won't deteriorate over time. That insulated duct is the only return air duct in the back of the house. I removed all the nails to the left and ripped out the bizarre 2x4 with a row of nails to hang bits of wire on to the right. There was also a hole to the rest of the crawl space that I taped over with the plastic to stop a pretty strong cold draft into the space. You can see that below:
Here's where the people under the stairs would live:
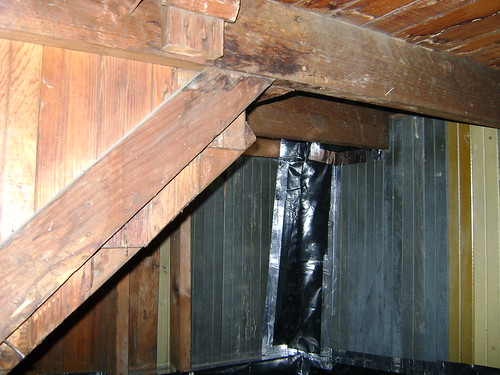
A crawl space with a view:
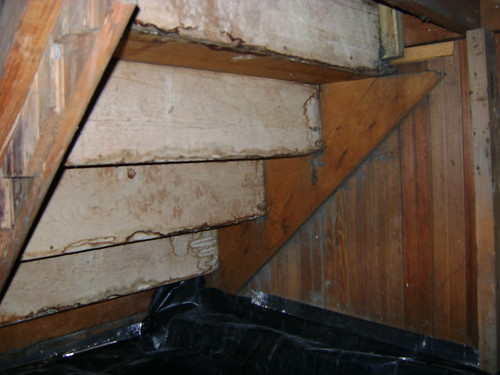
Okay so heres the finished insulation installed:
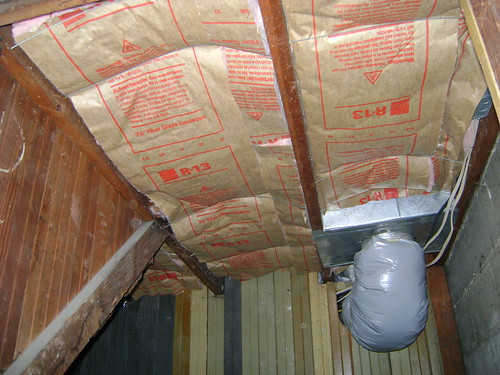
What's not apparent is how bass ackwards the addition to my house is - none of the floor joists were installed by a sane man - the first two joists are spaced 21" on center, while the next two are 19" on center. Standard floor joist spacing? 16" or 24" on center, which is why the insulation batts come in 15" or 23" widths. So I couldn't tack them in with my hammer style staple gun, I had to get 24" insulation support wires and wire cutting pliers and cut every support wire to size. And cut a 4" insulation strip to fill the joist bay fully. At least the insulation was "free" as I had it left over from my garage insulation job (which is another blog topic I want to write about at some point). But that's 40 sq. feet of my house that wasn't insulated at all now done, which should hopefully make some difference. Plus some extra storage space to stash stuff in. I don't know how convenient it'll be, but we'll see I guess. Yay DIY home improvement!